How to Create new user in Windows Server 2022 and 2019
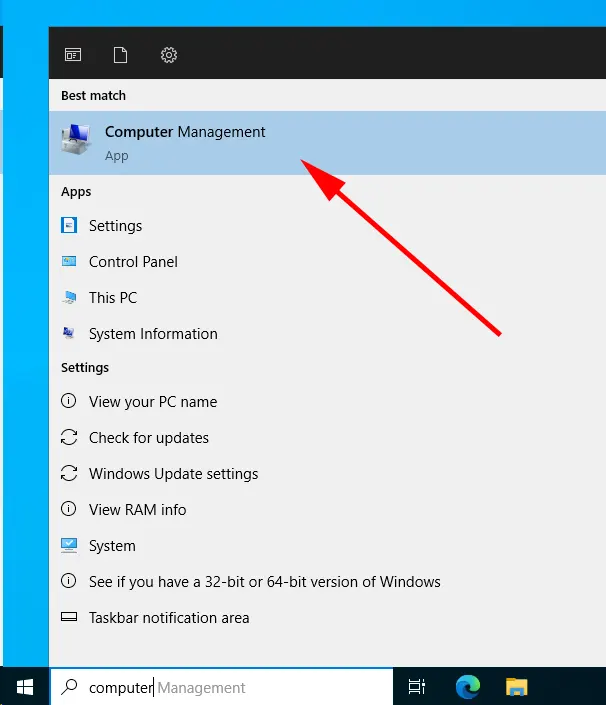
To quickly and easily create a new user in Windows Server 2022 and 2019, we recommend using the standard "Computer Management" tool. It is conveniently easy to use and very useful functionality, which gives you the opportunity to quickly make computer settings without performing unnecessary operations and transitions.
Let's take a look at how to add a user in Windows Server 2022 and 2019.
There are two quick options to start Computer Management:
1. Click on Start and start writing "Computer Management" in the search. Once you are shown the result - start the program.
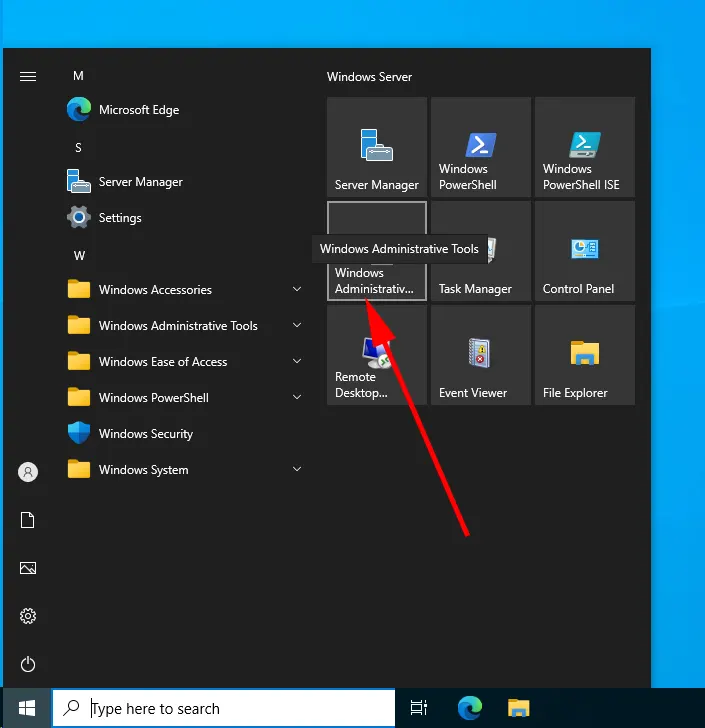
2. Click on Start and open the "Windows Administrative Tools" menu.
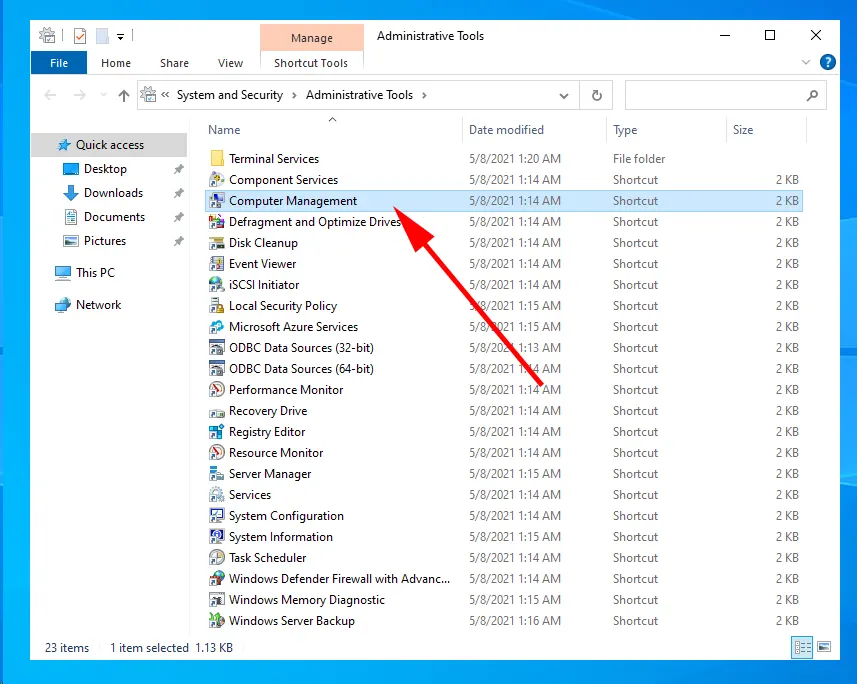
In the new window, click and start "Computer Management".
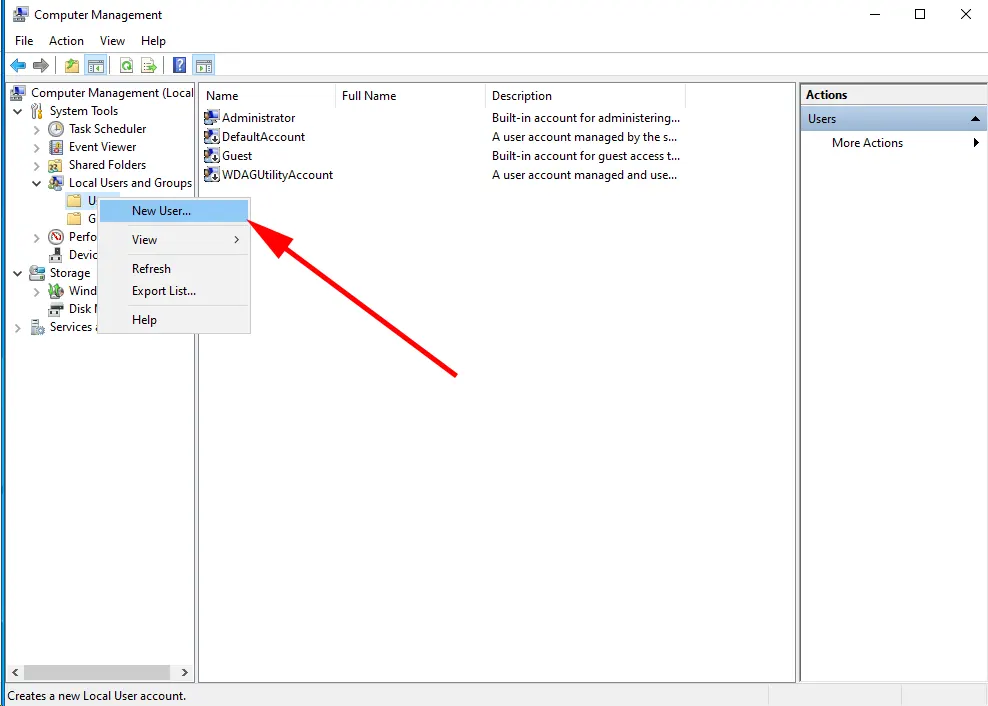
Go to Computer Management -> System Tools -> Local Users and Groups -> Users.
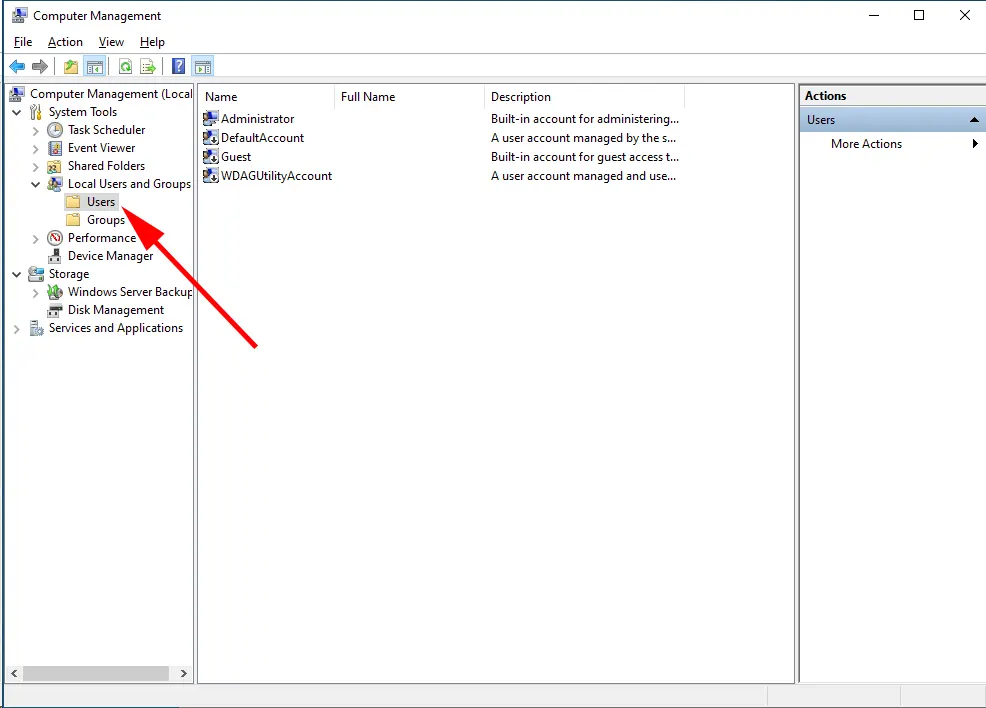
Right click on the Users directory and select New user
In the new window you need to fill in the fields User Name, Password, Confirm Password.
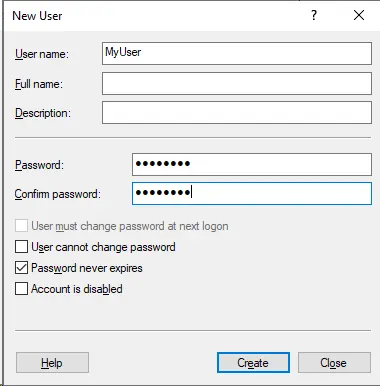
You can also set various user options by checking or unchecking the following options:
- User must change password at next logon: This is useful if you generated a password for the user.
- User cannot change password: Enabling this option prevents the user from changing their password.
- Password never expires: If you want the password to never expire, check this option (not recommended for security reasons).
- Account is disabled: If you don't want to enable the account immediately, you can check this option.
To finish creating a user with our set of options, click on Create and after the fields are empty, click on Close.
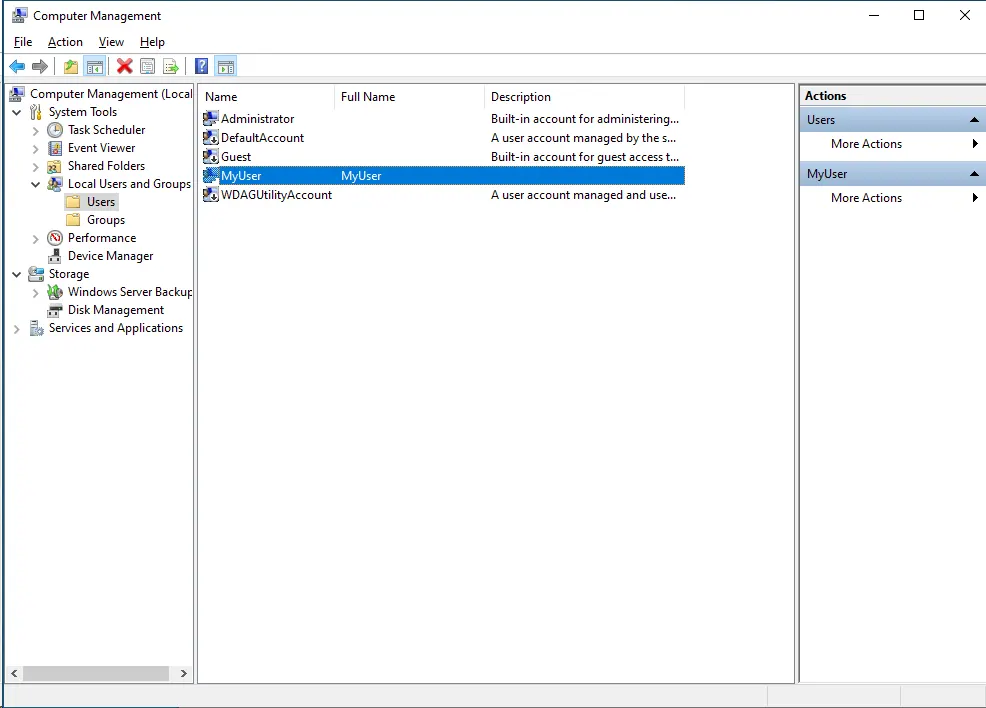
The new user has been added to the system and is ready to go!
In this article, we went over how you can add a user in Windows Server 2022 and 2019 and put it into practice. We hope that this article will be useful to you in your work and will allow you to customize your server in more detail.
https://finerdp.com/rdp-server


